Wednesday, May 22, 2013

Roasted Red Pepper and Goat Cheese on Ciabatta


As spring comes around the corner, this is something I find myself siding towards. It's best served cold, and no one enjoys cold fingers in the winter. But, ahhhh, in the spring, when you can finally get outside and enjoy lunch at the park or with your window open, this is a winner. It's fresh, very satisfying, and messy as all get out. Make sure you have napkins and don't care what you look like while you're eating. If you do care, eat alone or learn to glory in the goodness of well made food. I pick the later and try to do it with class.

Ingredients:

4 Ciabatta rolls, halved
8 oz goat cheese, at room temp
8-12 basil leaves

1 Jar of roasted red peppers, or 2 whole roasted red peppers
1/3 c balsamic vinegar
1/4 c olive oil
2 tablespoons capers, plus 1 tablespoon juice
2 cloves minced garlic
Salt
Pepper

Directions:
Drain canned peppers and place back in jar, or place roasted peppers in a shallow bowl. Mix balsamic vinegar, oil, capers, garlic, and salt/pepper and pour over peppers. For best results, marinate over night. For those who are craving this a little more immediately, spoon some sauce onto the bread to get the flavor effect.

Toast bread, layer on cheese, peppers, and top with basil leave.


Short hand: Marinate peppers, layer goat cheese, peppers and basil on toasted ciabatta bread. Eat like the Gods. 


Sunday, May 5, 2013

Spinach Artichoke Dip


Let's be real. There are a thousand different versions of spinach artichoke dips floating around out there. I won't start making outrageous claims about how "this is the best!!!! thing!!!! ever!!!!!" like some people do about their variation of it. Because lets face it - it's not. There are a lot of things in life that are waaaaay better. In fact, there's even better food out there. Shocker, right?

Regardless of how snarky I can be, this basic recipe scratched an itch I'd been having for something salty and crunchy.

When it comes down to it, it's a bunch of mashed up artichoke hearts (ah, the real reason I was labeled a heartbreaker my whole life!), a handful or two of spinach, a few spoons of mayo, shredded asiago cheese, and some garlic salt. Pepper if you're adventurous. Heck, you can even measure the ingredients if you're going Downton Abby Formal on my. So, like I said, there is nothing special about this, other than the fact that when you eat it hot, on a crunch chip, your mouth starts craving more and before you realize what you've done, the whole thing is gone.


Ingredients:
1 can artchoke hearts, drained and mashed
1/2 cup mayo
1/2 cup shredded asiago, parmesan, OR swiss cheese
1/2 cup frozen chopped spinach, thawed
1 teaspoon garlic salt

***For anyone who is following a slow card or 'four hour body' diet, omit the cheese. If you want to add protein, mix in a few spoonfuls of black beans.

Direction:
Mix everything together in a medium bowl, and transfer to a microwave or oven safe serving blow. Microwave for 2 minutes, stir. Return for an additional 2 minutes, stir again, and return for 1 minute. Yes, it's in there for five minutes. If not hot, keep heating in 1 minute intervals.


If for whatever reason you don't have or don't want to use your microwave, bake in a 350º oven for about 30 minutes.


I don't use seasoned hearts, FYI. 

I only use olive oil mayo - yes mayo is 4HB certified. 

Ahhh, the cheese. 

Eat your heart out! Get it?! Hearts?!? hahaha! 


Either way you cook it, you're going to have one hot, easy, and delicious dish waiting for tortilla chips to hurry it to your salivating mouth. Enjoy!

Short Hand: Mix everything. Nuke it for 5 minutes, stirring every few minutes. Eat with chips.

Tuesday, April 30, 2013

Grilled Salmon with Sweet Ginger Glaze


I found out shortly after eating this that I was allergic to asparagus. Thus, picture two is served with Brussels sprouts. 

I've toyed with this recipe for some time. I never really liked the concept of marinating fish, but I didn't like it plain either. So I played with the concept of short marinade times, but it always seemed like all the flavor just slid off once I cooked the fish. I was bored with lemon on salmon, but was craving fish all the same. So after an impromptu social media survey I took several of the ideas and combined them into this creation.

The whole idea behind a glaze is letting the fish cook for a bit, then slathering it with tantalizing flavors.

This will form a glazed coating around the fish that doesn't burn while you're trying to let your fish finish cooking.

 So when all is said and done, you have perfectly cooked fish sealed in a flavored coating that makes your mouth water looking at it. It's featured here with broiled asparagus and a Brussels sprouts side, respectively.

Served here with a Broiled Brussels side.  The pictures don't do justice to either dish! 

4 salmon fillets - ready to cook (deboned, defrosted... whatever applies to the situation)

Glaze:
4 cloves crushed garlic
1 teaspoon fresh ginger, grated
2 Tablespoons sweet soy glaze, or soy sauce
1 Tablespoon olive oil

Grill fish for 2 minutes then flip. Brush the already grilled side with glaze - cook an additional two minutes. Flip and glaze the other side and finish cooking. If desired, make and heat another batch of the glaze on medium high until bubbles start to form. Serve on the side for dipping.

I did this on a FormanGrill - so I grilled it for two minutes, then glazed the whole thing, and cooked an additional 2-3 minutes until firm. Fish will continue to cook once taken off the heat, so don't freak out if it's still a little undone when you check it coming off the grill.

Serve with veggies or rice.


Short hand - sear fish on grill - brush with glaze for the last two minutes of cooking. Serve hot. Duh.


Sunday, April 28, 2013

Hearty Vegetable Beef Soup

This is one of my comfort foods. Dicing the veggies, searing the meat, and tasting the almost finished product are all highly therapeutic.  Once it's done,  I love to ladle up a large bowl, heat up some good bread, and eat it as fast as humanly possible. Feeling full after eating this is one of the most enjoyable things for me.


With a thousand possible variations on how to make this, you can use this as a base recipe and come up with your own classic combination. I've been eating this since I was 3, and making it since I was 14, and the following recipe is my favorite after years of tweaking, testing, and tasting.

The ingredient list may seem intimidating, but honestly, it's just a bunch of veggies in a pot, simmered in savory beef broth with a few seasonings. It's super easy!


Ingredients (used in this order):

2 Tablespoons olive oil
1 - 1 1/2 lbs stewing beef
1 large onion, diced
1 teaspoon salt
1/2 teaspoon pepper

5-7 stalks celery, diced
4-5 large carros, diced
4-5 potatoes (sweet or regular), diced - optional

1/2 teaspoon Italian Seasoning
OR
1/2 teaspoon Herbs de Provence (what I use)

2 cups corn (thawed if using frozen)
8 cups beef broth

1 can diced fire roasted tomatoes
3 stalks kale or swiss chard
1/8 cup Worcestershire sauce

Directions:

In large pot, heat olive oil on high - don't let it smoke! Add beef, onion, salt and pepper. Sear meat until brown, and onions are starting to become translucent around the edges.


Add vegetables and spices. Cook, stirring frequently, about 10 minutes.


Add corn and broth. Bring to a boil, and reduce from high (yes, everything to this point is still done on high, or medium high - don't burn it) to low and simmer, covered, for about 11/2 - 2 hours hours, stirring occasionally.


Add tomatoes and chard/kale, and Worcestershire sauce. Stir well, taste, and adjust if necessary.


Viloa - you're done. Serve and enjoy the fruits of your labor!


Notes: Because this calls for more ingredients than I typically feature in my recipes, here are a few tips about how to streamline making this.

Get all your ingredients and tools out at once.
Take a basket around your kitchen, fridge, pantry, etc if you must.

Make a 'graveyard'. Designate a bowl, old plastic bag (featured), or similar as the place where all trash goes while cooking. This saves you needless steps to the trash can or constant turning and missed shots while attempting to lob your trash halfway across your kitchen. Dirty/used dishes or tools can go here too - this saves unnecessary trips to the sink.
Chop your veggies first, set aside, then chop your meat and be done
with the chopping block. This will reduce clean up amount and time.

Eyeball how much spice to use, as it's not an exact science. Measure if you're not confident in your ability to gauge.


Short Hand: Sear 1-2lbs stewing beef with eevo, s/p. Add 'hard' veggies and spices, saute 10 mins. Add broth and corn. Simmer 1-2 hours. Add 'soft' veggies. Cook 10 mins. Serve hot, fall in love.

Thursday, April 25, 2013

Tamales


Tamales get labeled under "Bold" as they aren't particularly beautiful or bright compared to the other stuff I cook. I made them over Christmas and had a blast!

For those who don't know, I grew up in Tucson Arizona on four acres of raw desert. We played our pants off most days - throwing cactus around like it was no big deal, catching lizards, and getting scared by spiders. Most years at Christmas we'd visit a neighborhood called "Winter Haven" and drove around looking at all the Christmas lights on palm tree's and cactuses that adorned peoples front yards. Additionally, this time of year is when my paternal grandmother pulled out all the stops and stuffed us full of tamales. She'd lay out everything assembly line style, line us up, and we'd crank out tamales like nobody's business. Also, as I think about it, I realized she's Southern Bell by birth, so I'm not really sure when Christmas Tamales started in our family. However - they're delicious either way, and I hope you enjoy them if you embark on making them!

Because tamales are a little bit difficult if you've never made them, I've posted this in a picture tutorial type post. Recently I hosted a tamale making party where my friend Mandi was kind enough to take pictures.

We made beef, pork, and sweet (dried figs and almonds).


Savory Tamales 

Carne Mix
3.5 lb meat (pork, beef, chicken)
5 cloves garlic
1 med onion, cut into hunks

Slow cook meat with garlic and onion. Shred, and add salsa. 

Salsa

1 can chipotle chilies in adobe sauce
6 cloves garlic
1/2 medium onion
1 T ground cumin
1 T chili powder
2 T salt
2 T Olive Oil

2 cups broth

Pulverize in a food processor. Taste.

TASTE!!!! If you don't taste your salsa, and pour it over your meat, you run the risk of ruining all that beautiful meat. So taste your salsa at every. step. of. the. way. Make sure you like it, and it's strong. 

Mix broth into pepper puree, taste again.

Pour over shredded meat, and refrigerate overnight. 

Masa:
3/4 c lard or crisco (room temp)
6 c broth
6 c masa harina (corn flour)
1 1/2 t baking powder
3+ T salt (likely you'll add more)
Corn husks

Soak corn husks in hot water (ziplock bags work best). Rinse and separate. 

Mix dry ingredients in large bowl (harina, salt, backing powered); add lard and broth.  Mix until combine - add water or flour as needed until the consistency is like a soft Play-Dough. It should not be runny or overly sticky. 

Taste - add salt as needed. 

Ingredients all l
Spread about 3 T masa on corn husk, fill with meat, and fold corn husk to form the tamale. Leave about 1/2 inches as the top, and 4 inches at the bottom to allow expansions and proper folding/sealing, respectively. (This image is a good reference: http://cookingwithclint.files.wordpress.com/2011/05/traditional-tamales-page-2.jpg)

Spreading the masa


Adding the carne


Wrapping it up 


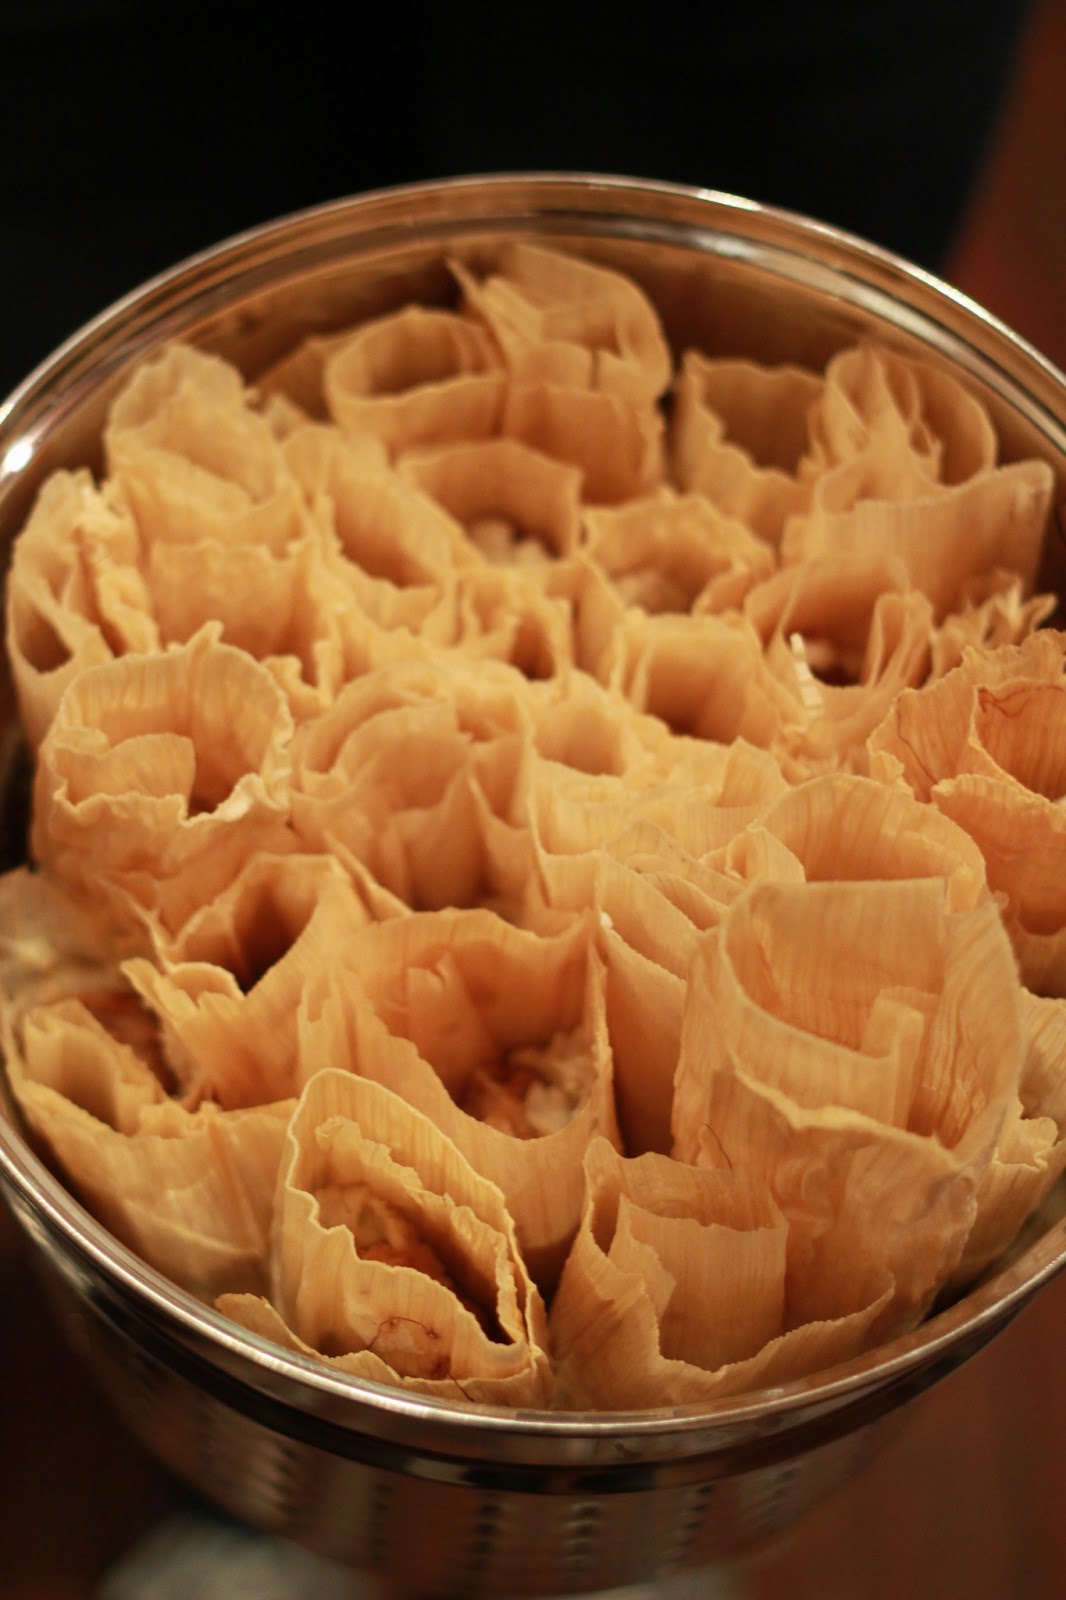
Because there are various steps in the process, figure out a system that works for you. I typically lean my steaming basket on it's edge, and keep everything within reach. From left to right - masa, husks, meat, basket.

Stack tamales, seam side down in steaming basket.


Bring water to a boil*, add tamale basket, turn down to a simmer, and steam for about 50-60 mins. 

Checking water levels quickly

We tried wrapping some in parchment paper. The one of the left is the original corn husk, and you can see the traditional texturing that are halmarks of tamales.  Parchment paper doesn't change the way they taste, just how they look. 

Served well with refried black beans, topped with sour cream or fresh salsa, and lime

Served with a little extra carne on top, cilantro and a wedge of lime. Amazingly delicious! 

Sweet Tamales:

2 c water
2 c masa harina
1/3  c lard
1/2 t baking powder
1 c sugar
dried fruit and nuts as desired

We used chopped dried figs and pecans, pictured below. Rasins and walnuts are amazing also.

Mix everything together. Place 3 T masa mixture into small corn husk, wrap, and steam. These traditionally do not have filling, but have the dried fruit and nuts mixed in with the masa.

Steam 20-30 mins.


*Penny Trick - place a penny at the bottom of your pot. When the water starts to boil you'll hear it rattle. If you don't keep water in the bottom of the pot, you'll burn your tamales, so the penny allows you to know if you need to add more water. If it's rattling - you're good. If it starts to slow - check water levels. If it stops - act quickly!! Get some water in that sucker and save the tamales! 

Tuesday, April 23, 2013

Roasted Fingerling Potatoes

Featured here is a variety mix of potatoes. The purple things you see are indeed potatoes. Delicious ones I would add. 


Here is a confession - I had never made these before I served them to my Easter Dinner guests. And I didn't taste them before I served them. There! I said it!

Generally speaking, I try all sorts of crazy concoctions in the kitchen. I do not however feed first time passes to guests. This was an exception as I had made things very similar to this before and was confident (perhaps overly so) that it wasn't a big deal. I was nevertheless thrilled that it worked.

Also, I must confess that I'm even more tickled it worked because after I tossed the taters in the seasoned coating, I tasted it and freaked out about how salty it was. My rational for continuing was "They need to start cooking now if they're going to be ready. A bunch of this will fall off or cook out (fingers crossed). And - potatoes can be a black hole for salt - right?!" True enough, all three things happened, and these turned out to be perfectly seasoned, have a lightly crunchy outside, and tenderly delicious inside.

And thus I give you - Roasted Fingerling Potatoes with Parmesan Garlic Seasoning


Ingredients:

1 lb fingerling potatoes, washed

1 stick butter (1/2 cup)
1 Tablespoon garlic salt   (see why I freaked out when I tasted it!?)
1 teaspoon garlic powder
1/2 cup grated parmesan (use the bottled green kind, it works best)
2 tablespoons dry parsley OR 3 Tablespoons fresh

Directions:

Pre-heat oven to 400º

In a medium pot, fill with enough water to cover potatoes. Bring to boil on medium high and boil for 10 minutes.
Meanwhile, microwave butter until melted (or heat in small sauce pan). Once melted, add remaining ingredients (garlic salt/powder, parm, and parsley) and stir.
Once potatoes have finished the par-boil, drain, and toss with the butter mixture until all potatoes are evenly coated.
Place on baking sheet or pan and bake for 30-40 minutes until crisp on the outside and tender on the inside. Allow to cool 4-6 minutes before serving.


Short Hand:
Par-boil potatoes 10 mins. Add seasoning to melted butted and toss with potatoes. Bake 30-40 mins @400º.


Chocolate Raspberry Trifle


This is something that was inspired during my time in California. I had a similar desert while living there and decided that I wanted to create my own version of it. I never really had a good name for it, so I'd just set it down and say something to the effect of "This is a raspberry, chocolate mousse, and brownie trifle." And ya know what? I've come to think that "Raspberry, Chocolate, and Brownie Trifle", or some variation thereof, sums it up okay. 

This is also a dish that is a personal favorite and something I consider one of my signature deserts. I love making it, I love eating it, and I love looking at it. It's beautiful, elegant, and extremely delicious.
Plus, if you cheat (like I usually do), and don't make it from scratch, it's SUPREMELY easy. 


Ingredients: 
1 batch Triple Chocolate Ghirardelli Brownies
1 bag Frozen Raspberries 
2 boxes/cups Chocolate Mousse (I used the boxed kind, look for it near the jello and pudding).

Directions:
Bake brownies, and make the mousse. When the brownies are cooled, crumble them into bite sized chunks. 
Layer brownie crumbles and mousse and frozen raspberries in small dishes, or large trifle bowl. Chill about 1-2 hours, until mousse is chilled and raspberries are defrosted. 

Fresh raspberries can be used, but pre-chill the mousse and brownies in advance, and server immediately after composing. 


Short hand:
Layer brownie crumbles, mousse, and frozen raspberries. Chill for 1-2 hours.